> ## Documentation Index
> Fetch the complete documentation index at: https://docs.sammylabs.com/llms.txt
> Use this file to discover all available pages before exploring further.
# Jira Integration
> Lightweight integration for automated documentation generation with Sammy AI
The Sammy Jira integration automatically captures ticket data from your Jira issues and sends it to Sammy's AI platform for documentation generation and knowledge updates. Using webhook events, Sammy processes ticket information whenever issues are updated or transitioned in your Jira workspace.
## How It Works
The integration works by setting up webhook events in Jira that send ticket data to Sammy whenever issues are created, updated, or transitioned. Sammy authenticates with your Jira instance using an API token to retrieve additional context and process the information for knowledge base updates.
### Setup Process
Create a Jira service account and generate an API token for authentication
Generate your Sammy API key from the admin dashboard
Set up Jira automation rules to send webhook requests to Sammy
Create or update issues to trigger documentation generation
## Requirements
**Jira Setup**
* Jira project with admin permissions
* Ability to create service users and API tokens
* Permission to configure webhooks
**Sammy Account**
* Active Sammy account with admin access
## Installation Guide
### Step 1: Create Service User and API Token
Create a dedicated service user in your Jira instance for Sammy integration. Navigate to **User Management** and create a new user with appropriate project permissions.
Log in as the service user and click on your profile icon in the top right corner, then select **Account settings**
In the account settings, click on the **Security** tab to access API token management
Scroll down to the **API tokens** section and click **Create API token**. Give it a meaningful name like "Sammy Integration Token"
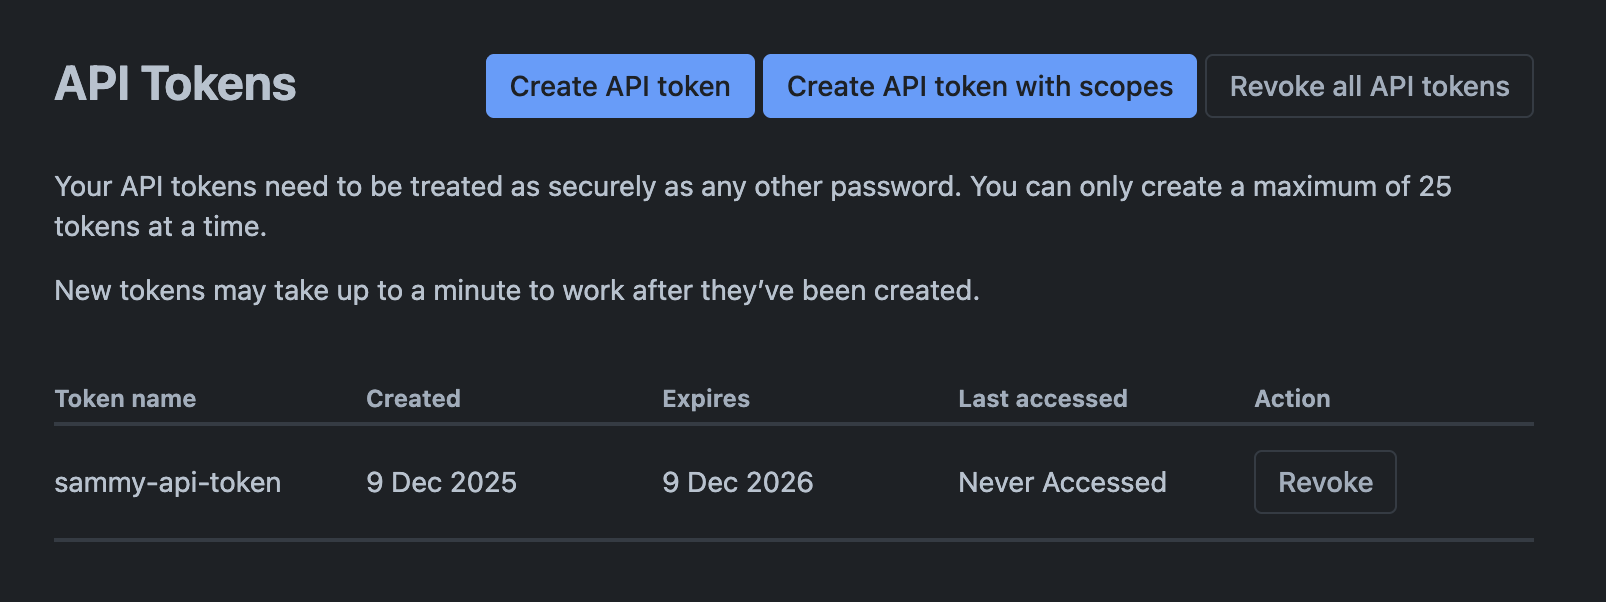 Copy the generated API token immediately and securely share it with your Sammy admin. The token will not be displayed again after you close this dialog.
### Step 2: Get Sammy API Key
Navigate to your [SAMMY admin dashboard](https://app.sammylabs.com/admin/organisation-settings) and go to the **API Keys** tab
Copy the generated API token immediately and securely share it with your Sammy admin. The token will not be displayed again after you close this dialog.
### Step 2: Get Sammy API Key
Navigate to your [SAMMY admin dashboard](https://app.sammylabs.com/admin/organisation-settings) and go to the **API Keys** tab
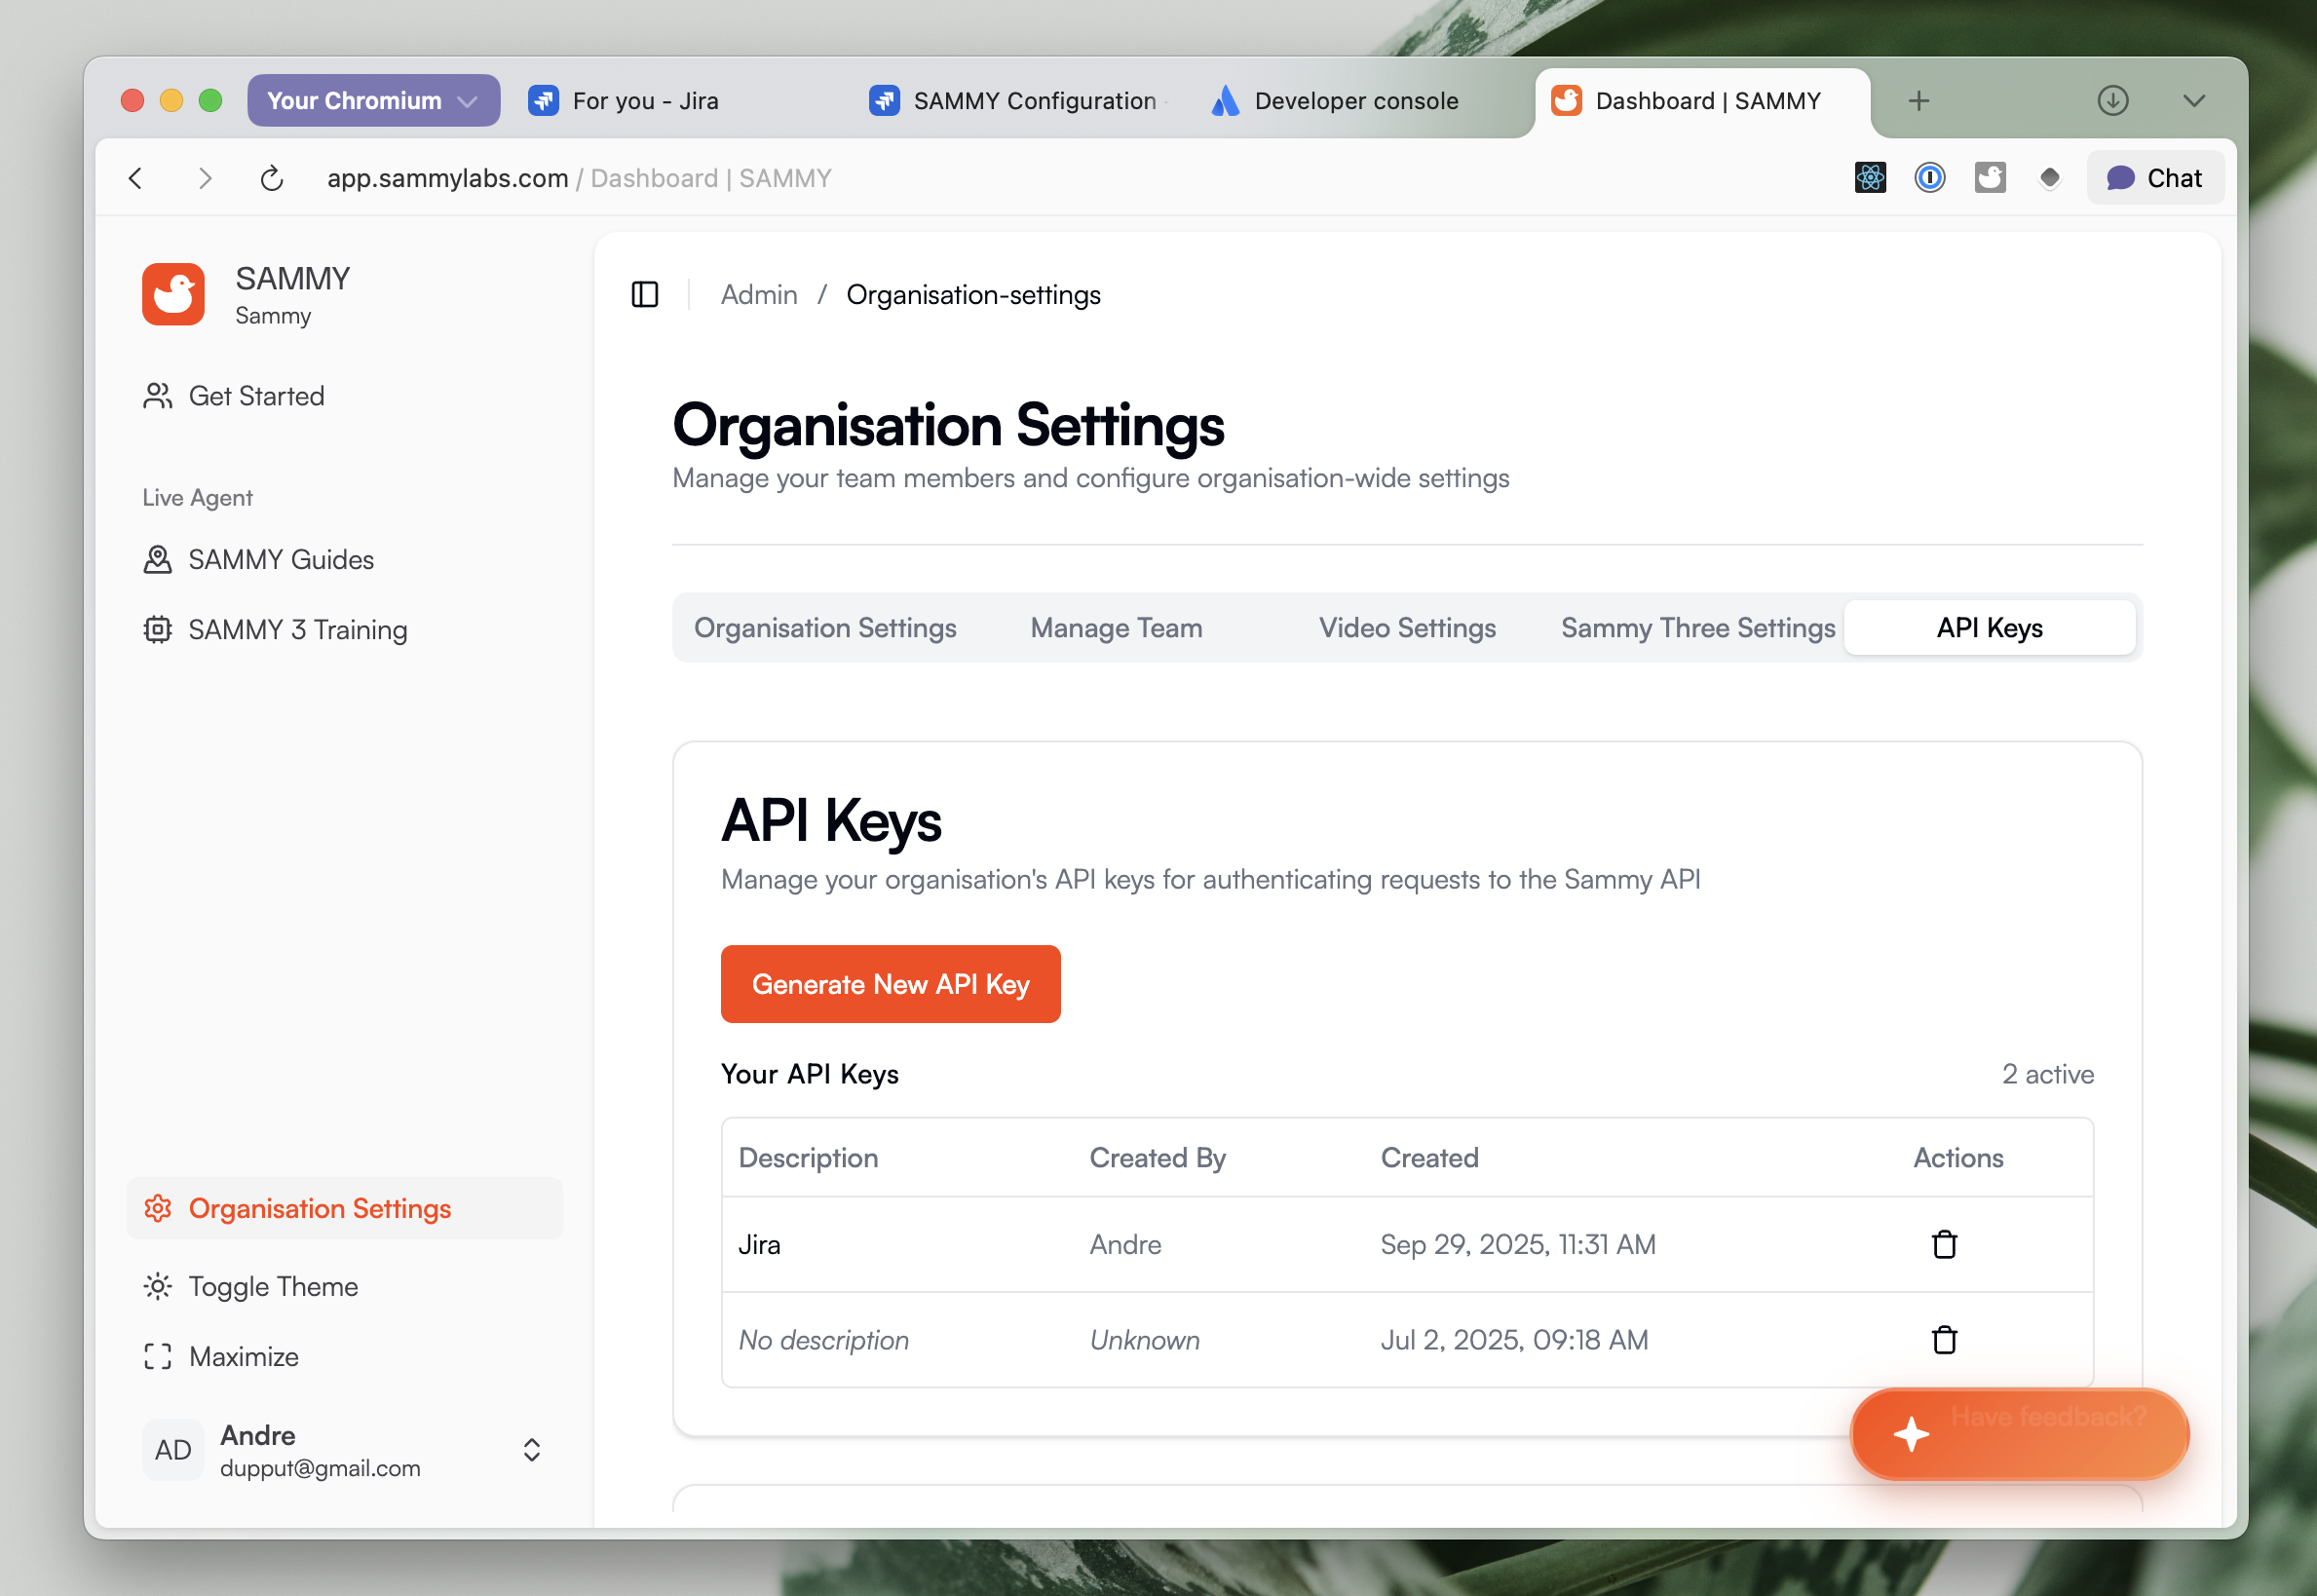 Click **Generate New API Key** and give it a descriptive name like "Jira Integration"
Copy the generated API key immediately - you'll need this for the webhook configuration in the next step
### Step 3: Configure Webhook Integration
Configure Jira automation rules to send webhook requests to Sammy whenever issues are created, updated, or transitioned.
In your Jira project, navigate to **Project Settings** → **Automation** tab
Click **Generate New API Key** and give it a descriptive name like "Jira Integration"
Copy the generated API key immediately - you'll need this for the webhook configuration in the next step
### Step 3: Configure Webhook Integration
Configure Jira automation rules to send webhook requests to Sammy whenever issues are created, updated, or transitioned.
In your Jira project, navigate to **Project Settings** → **Automation** tab
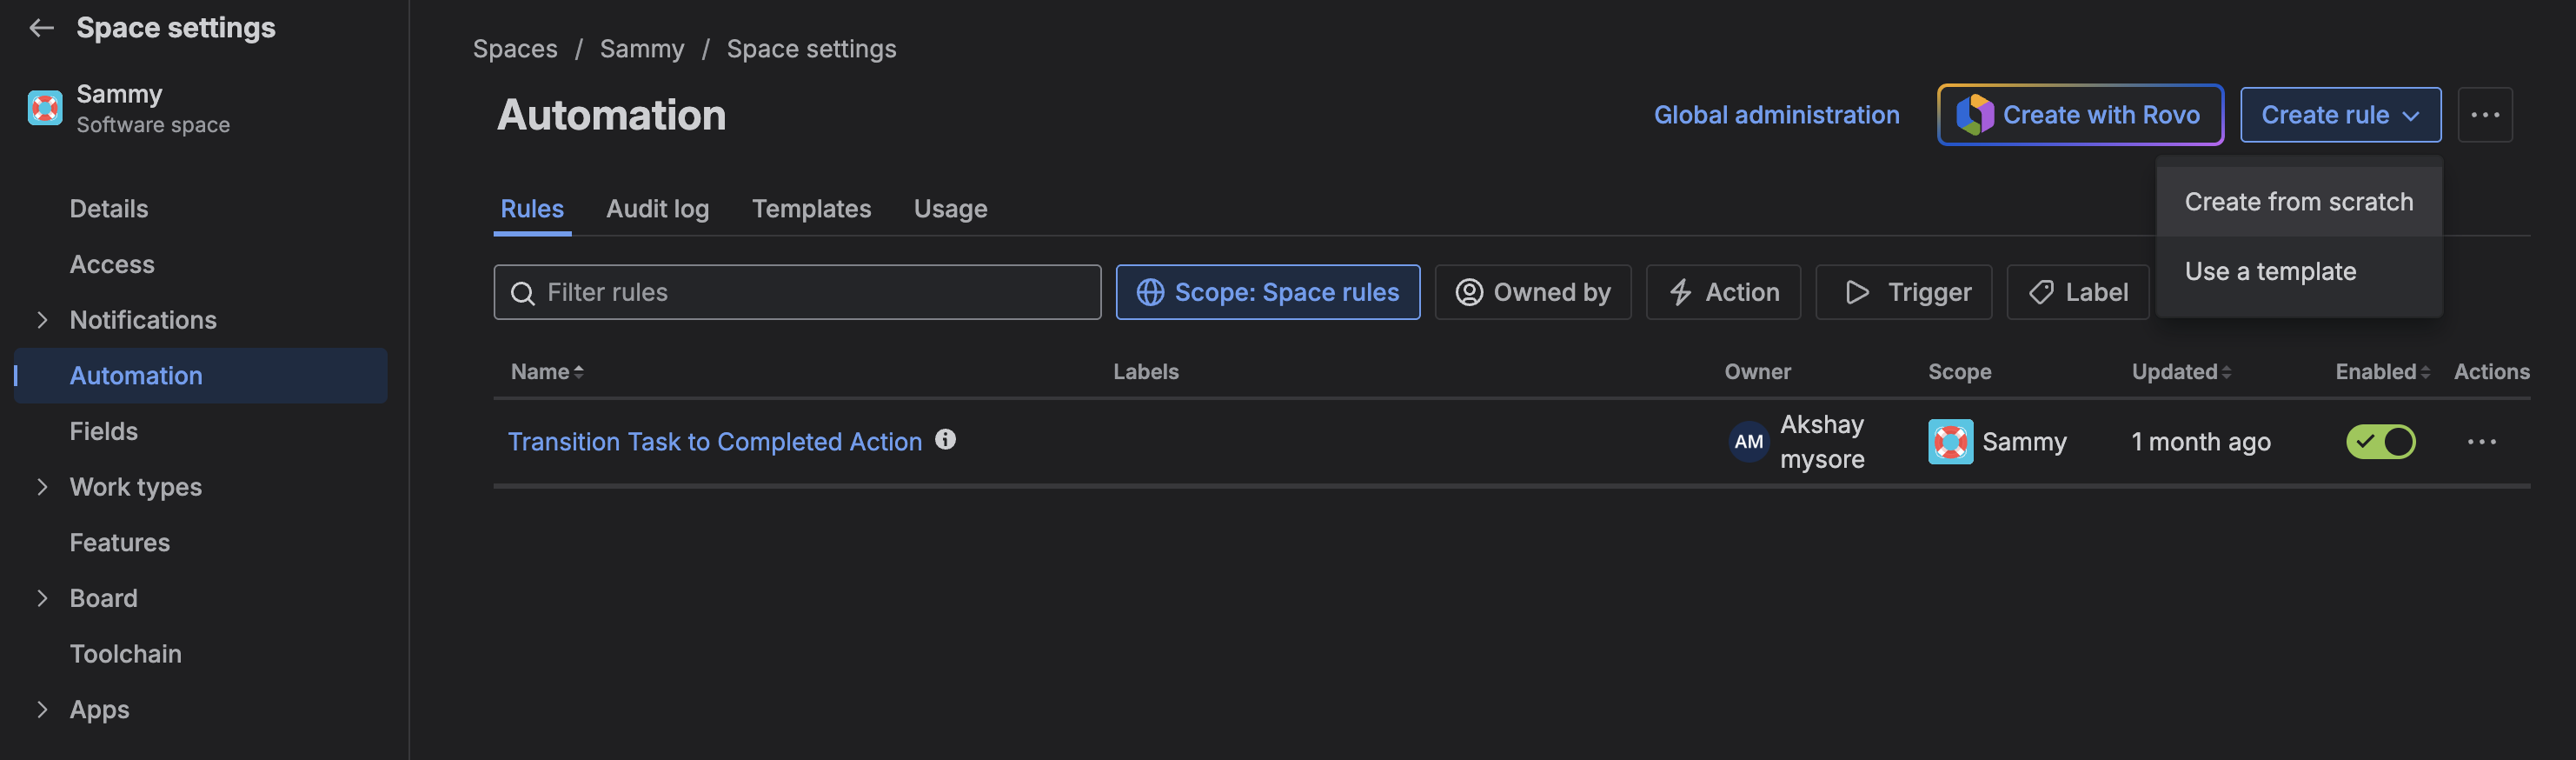 Click **Create rule** and select **Create from scratch** to build a custom automation rule
Choose a trigger that matches when you want to send data to Sammy:
* **Work item created** - for new issues
* **Work item transitioned** - for status changes
* **Work item updated** - for any modifications
Click **Create rule** and select **Create from scratch** to build a custom automation rule
Choose a trigger that matches when you want to send data to Sammy:
* **Work item created** - for new issues
* **Work item transitioned** - for status changes
* **Work item updated** - for any modifications
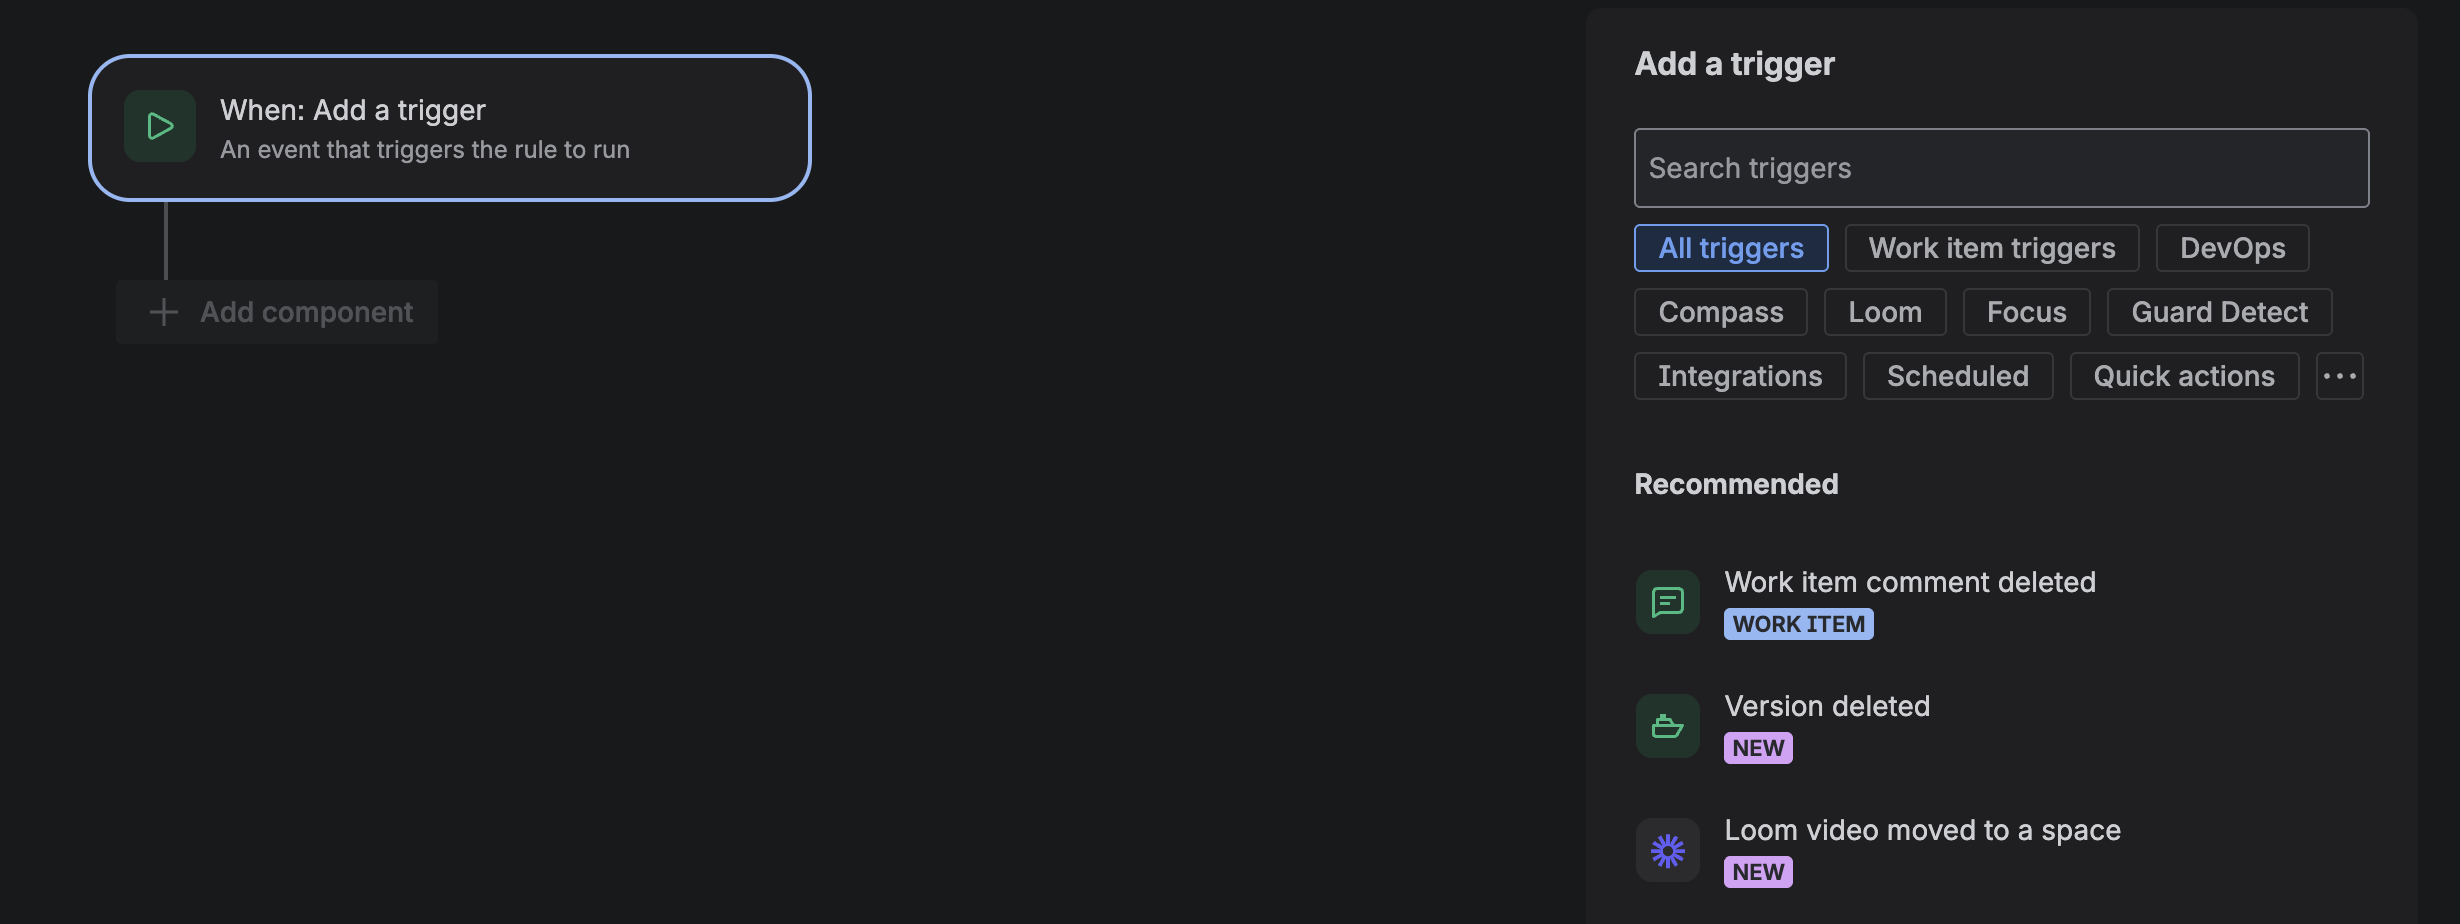 Click **Add component** and select **Send web request** action
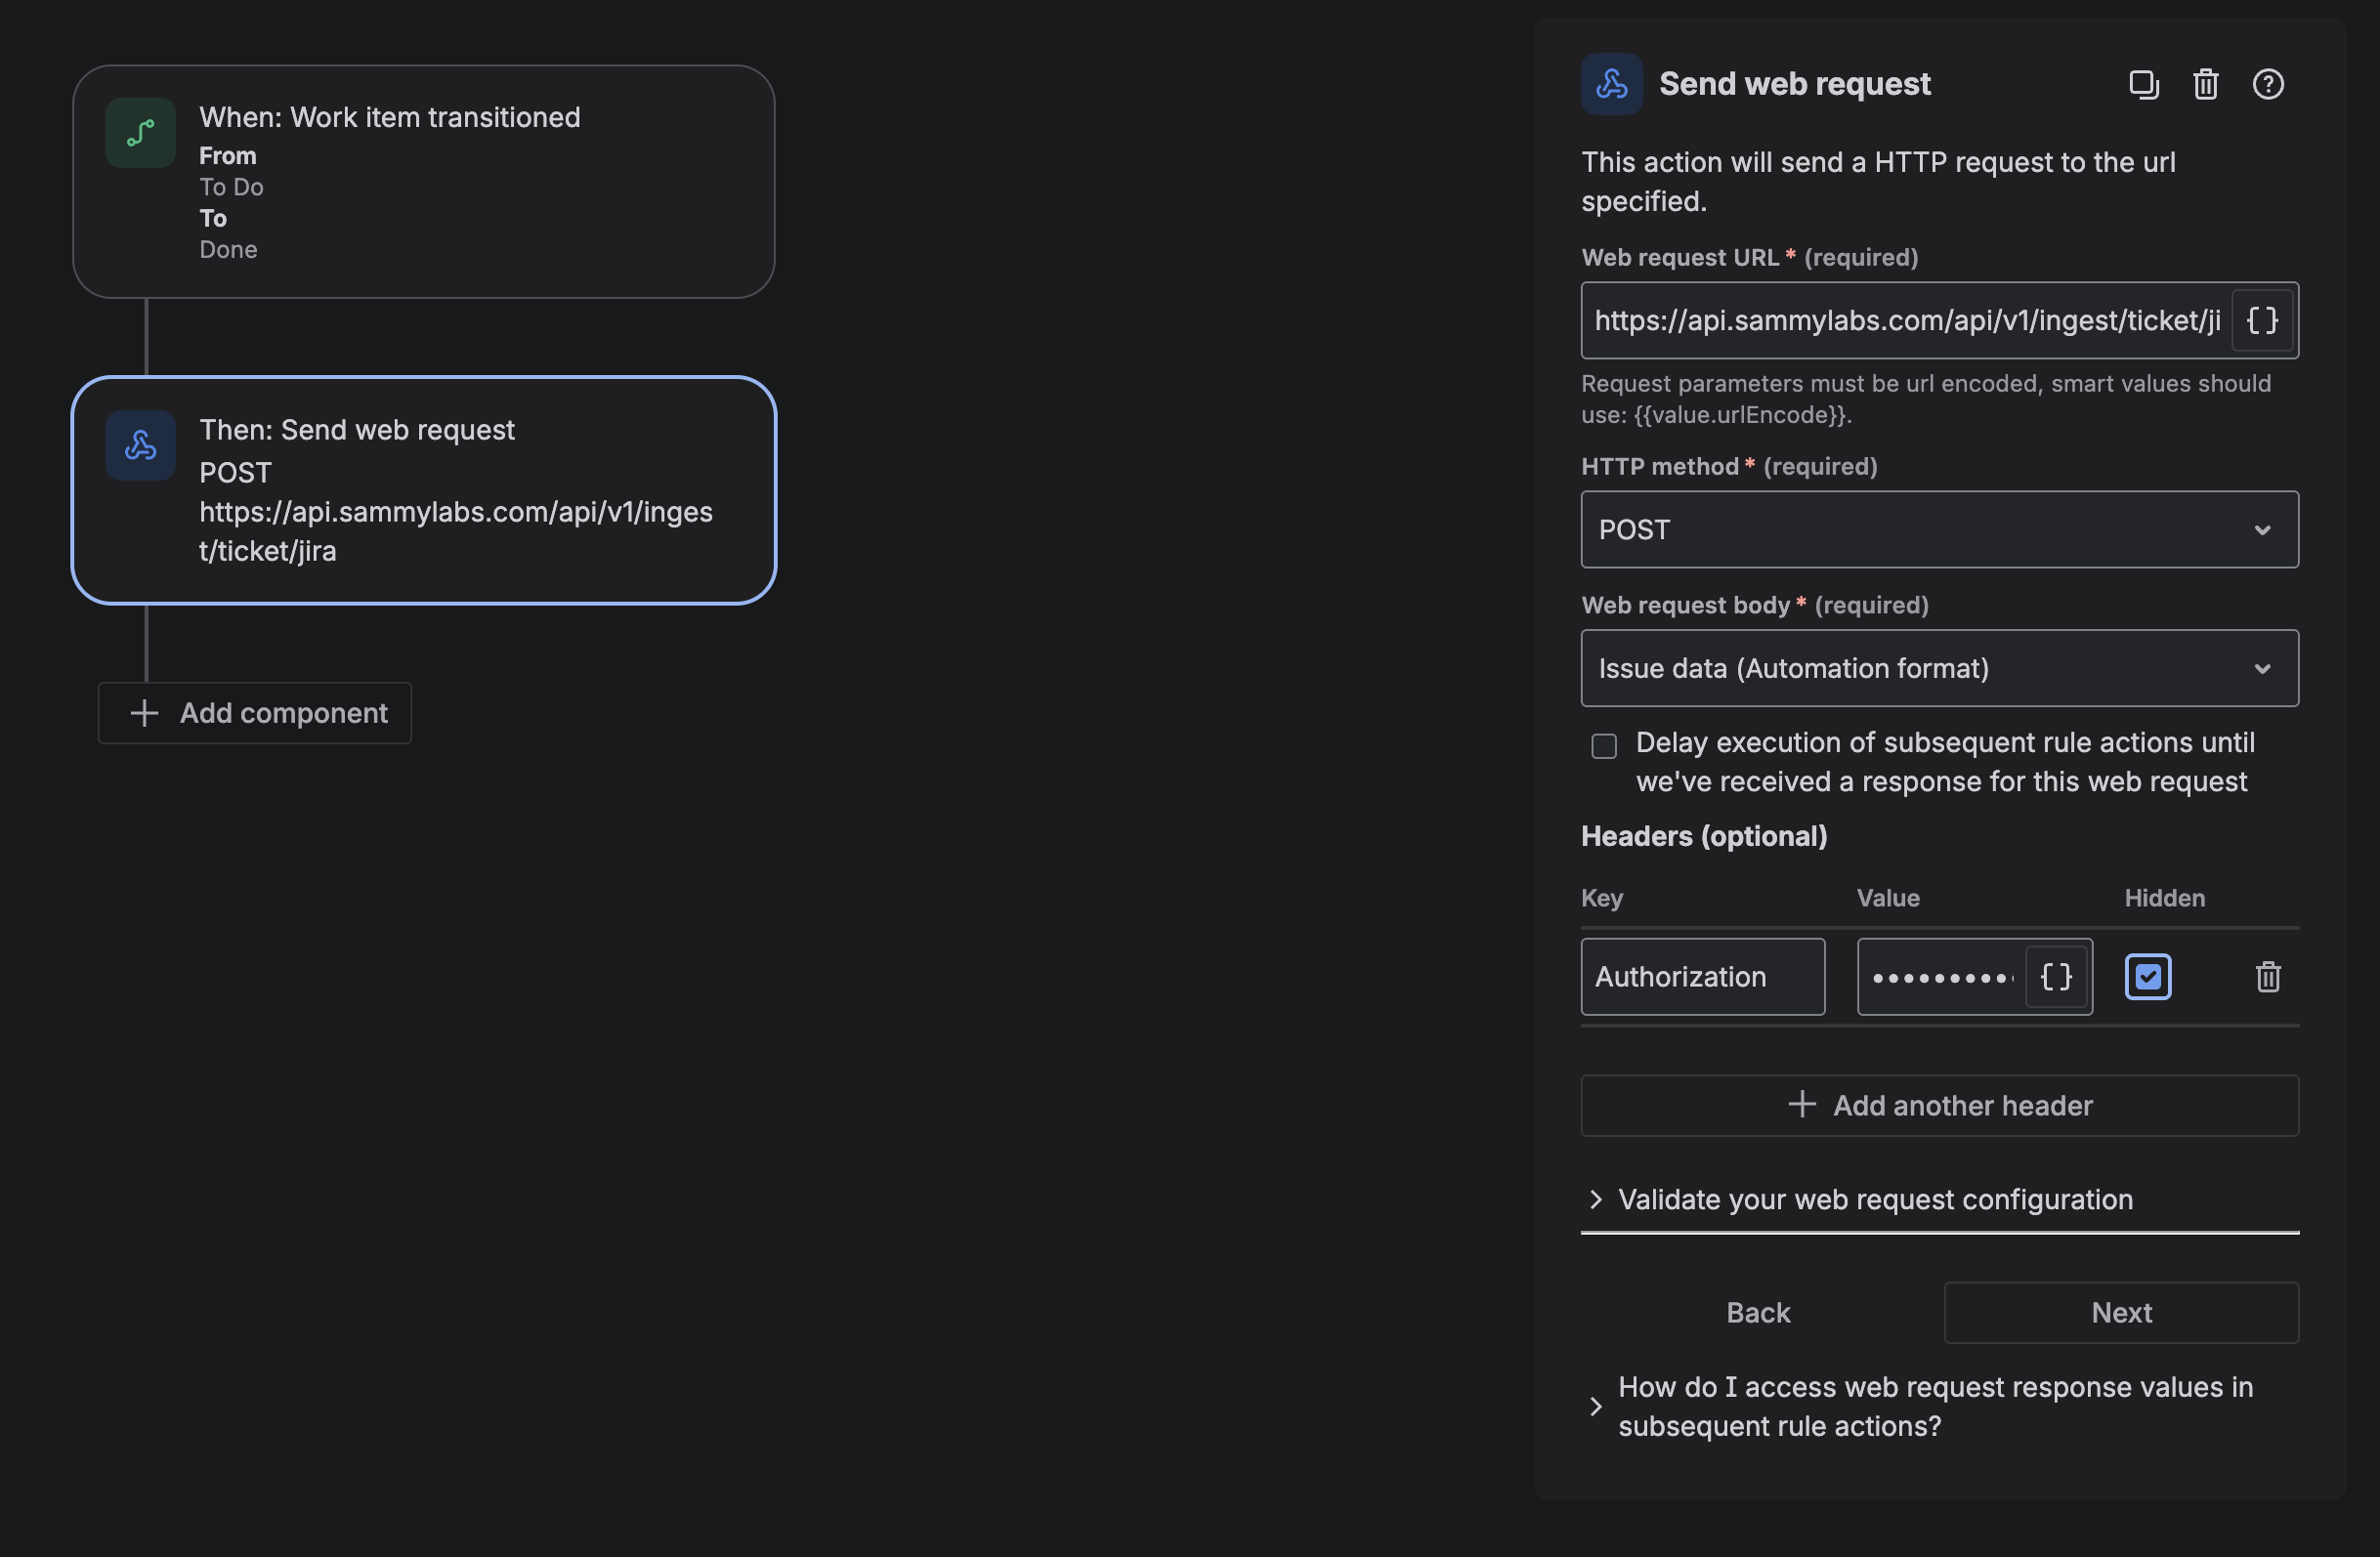 Fill in the web request details:
* **Web request URL**: `https://api.sammylabs.com/api/v1/ingest/ticket/jira`
* **HTTP method**: `POST`
* **Web request body**: Select `Issue data (Automation format)`
* **Headers**: Add Authorization header with value `Bearer [YOUR_SAMMY_API_KEY]` (from Step 2)
Save the automation rule and test it by creating or updating an issue. Verify that the web request sends successfully and receives a 200 response.
The automation rule will automatically trigger whenever issues match your selected trigger conditions, sending real-time updates to Sammy for processing.
### Step 4: Start Using
Create or update a test issue in your Jira project to verify the automation rule triggers correctly
Check that the web request returns a 200 response in the automation rule execution history
Start creating and updating issues normally - Sammy will automatically process them and update your knowledge base
## Summary
You've successfully set up the Sammy Jira integration! Here's what you've accomplished:
✅ **Created service user and API token** for Jira authentication\
✅ **Configured automation rules** to send webhook requests to Sammy\
✅ **Connected to Sammy API** with proper authorization headers
Now when issues are created, updated, or transitioned, Sammy will automatically:
* Receive ticket data via webhook requests (summary, description, comments, custom fields)
* Process the information using AI for knowledge updates
* Update your organization's knowledge base in real-time
The integration runs seamlessly using Jira's built-in automation system, providing immediate updates whenever your specified trigger conditions are met.
## Getting Support
If you encounter issues:
1. Verify your service user has appropriate project permissions
2. Confirm your API tokens are valid and haven't expired
3. Check webhook configuration and endpoint connectivity
4. Review Sammy admin dashboard for integration status
For additional support, contact the Sammy team with your Jira instance URL, service user details, and any error messages.
Fill in the web request details:
* **Web request URL**: `https://api.sammylabs.com/api/v1/ingest/ticket/jira`
* **HTTP method**: `POST`
* **Web request body**: Select `Issue data (Automation format)`
* **Headers**: Add Authorization header with value `Bearer [YOUR_SAMMY_API_KEY]` (from Step 2)
Save the automation rule and test it by creating or updating an issue. Verify that the web request sends successfully and receives a 200 response.
The automation rule will automatically trigger whenever issues match your selected trigger conditions, sending real-time updates to Sammy for processing.
### Step 4: Start Using
Create or update a test issue in your Jira project to verify the automation rule triggers correctly
Check that the web request returns a 200 response in the automation rule execution history
Start creating and updating issues normally - Sammy will automatically process them and update your knowledge base
## Summary
You've successfully set up the Sammy Jira integration! Here's what you've accomplished:
✅ **Created service user and API token** for Jira authentication\
✅ **Configured automation rules** to send webhook requests to Sammy\
✅ **Connected to Sammy API** with proper authorization headers
Now when issues are created, updated, or transitioned, Sammy will automatically:
* Receive ticket data via webhook requests (summary, description, comments, custom fields)
* Process the information using AI for knowledge updates
* Update your organization's knowledge base in real-time
The integration runs seamlessly using Jira's built-in automation system, providing immediate updates whenever your specified trigger conditions are met.
## Getting Support
If you encounter issues:
1. Verify your service user has appropriate project permissions
2. Confirm your API tokens are valid and haven't expired
3. Check webhook configuration and endpoint connectivity
4. Review Sammy admin dashboard for integration status
For additional support, contact the Sammy team with your Jira instance URL, service user details, and any error messages.